

Quick start
Create a profile for a host, install it, and open its desktop.
This walks through a first host, in Rookery's screens and then with the commands alone. The example uses an Ubuntu 26.04 server you can already reach over SSH, at 192.0.2.10. The other ways to install differ only in what you choose on the Install tab. With no server set, Rookery keeps everything on your machine. No server has to run.
Create the host
rookery ui studioA name Rookery doesn't know starts a new host, whose profile Rookery saves in its store under the name studio. rookery ui alone opens the home screen, where n creates a host. rookery host create studio asks the same questions on the command line, as the last section shows. rookery host export studio prints the profile as JSON.
Choose how to install
The profile opens on Install (key 1). Choose Existing host over SSH under How To Install, then enter the address in SSH address: an IP, a hostname or a Host alias from your SSH configuration. The Tailscale settings are on this tab too.
The set-up has four tabs. Each one depends only on the tabs before it.
| Tab | Key | What it holds |
|---|---|---|
| Install | 1 | How to install, and what that needs: the address, the hostname, Tailscale |
| Features | 2 | What gets installed |
| Settings | 3 | Everything with a default, such as accounts, registries and secrets |
| Run | 4 | Every open problem, and the button that installs |
Tab and Shift+Tab switch tabs too. Ctrl+S saves the profile at any point.
Choose what to install
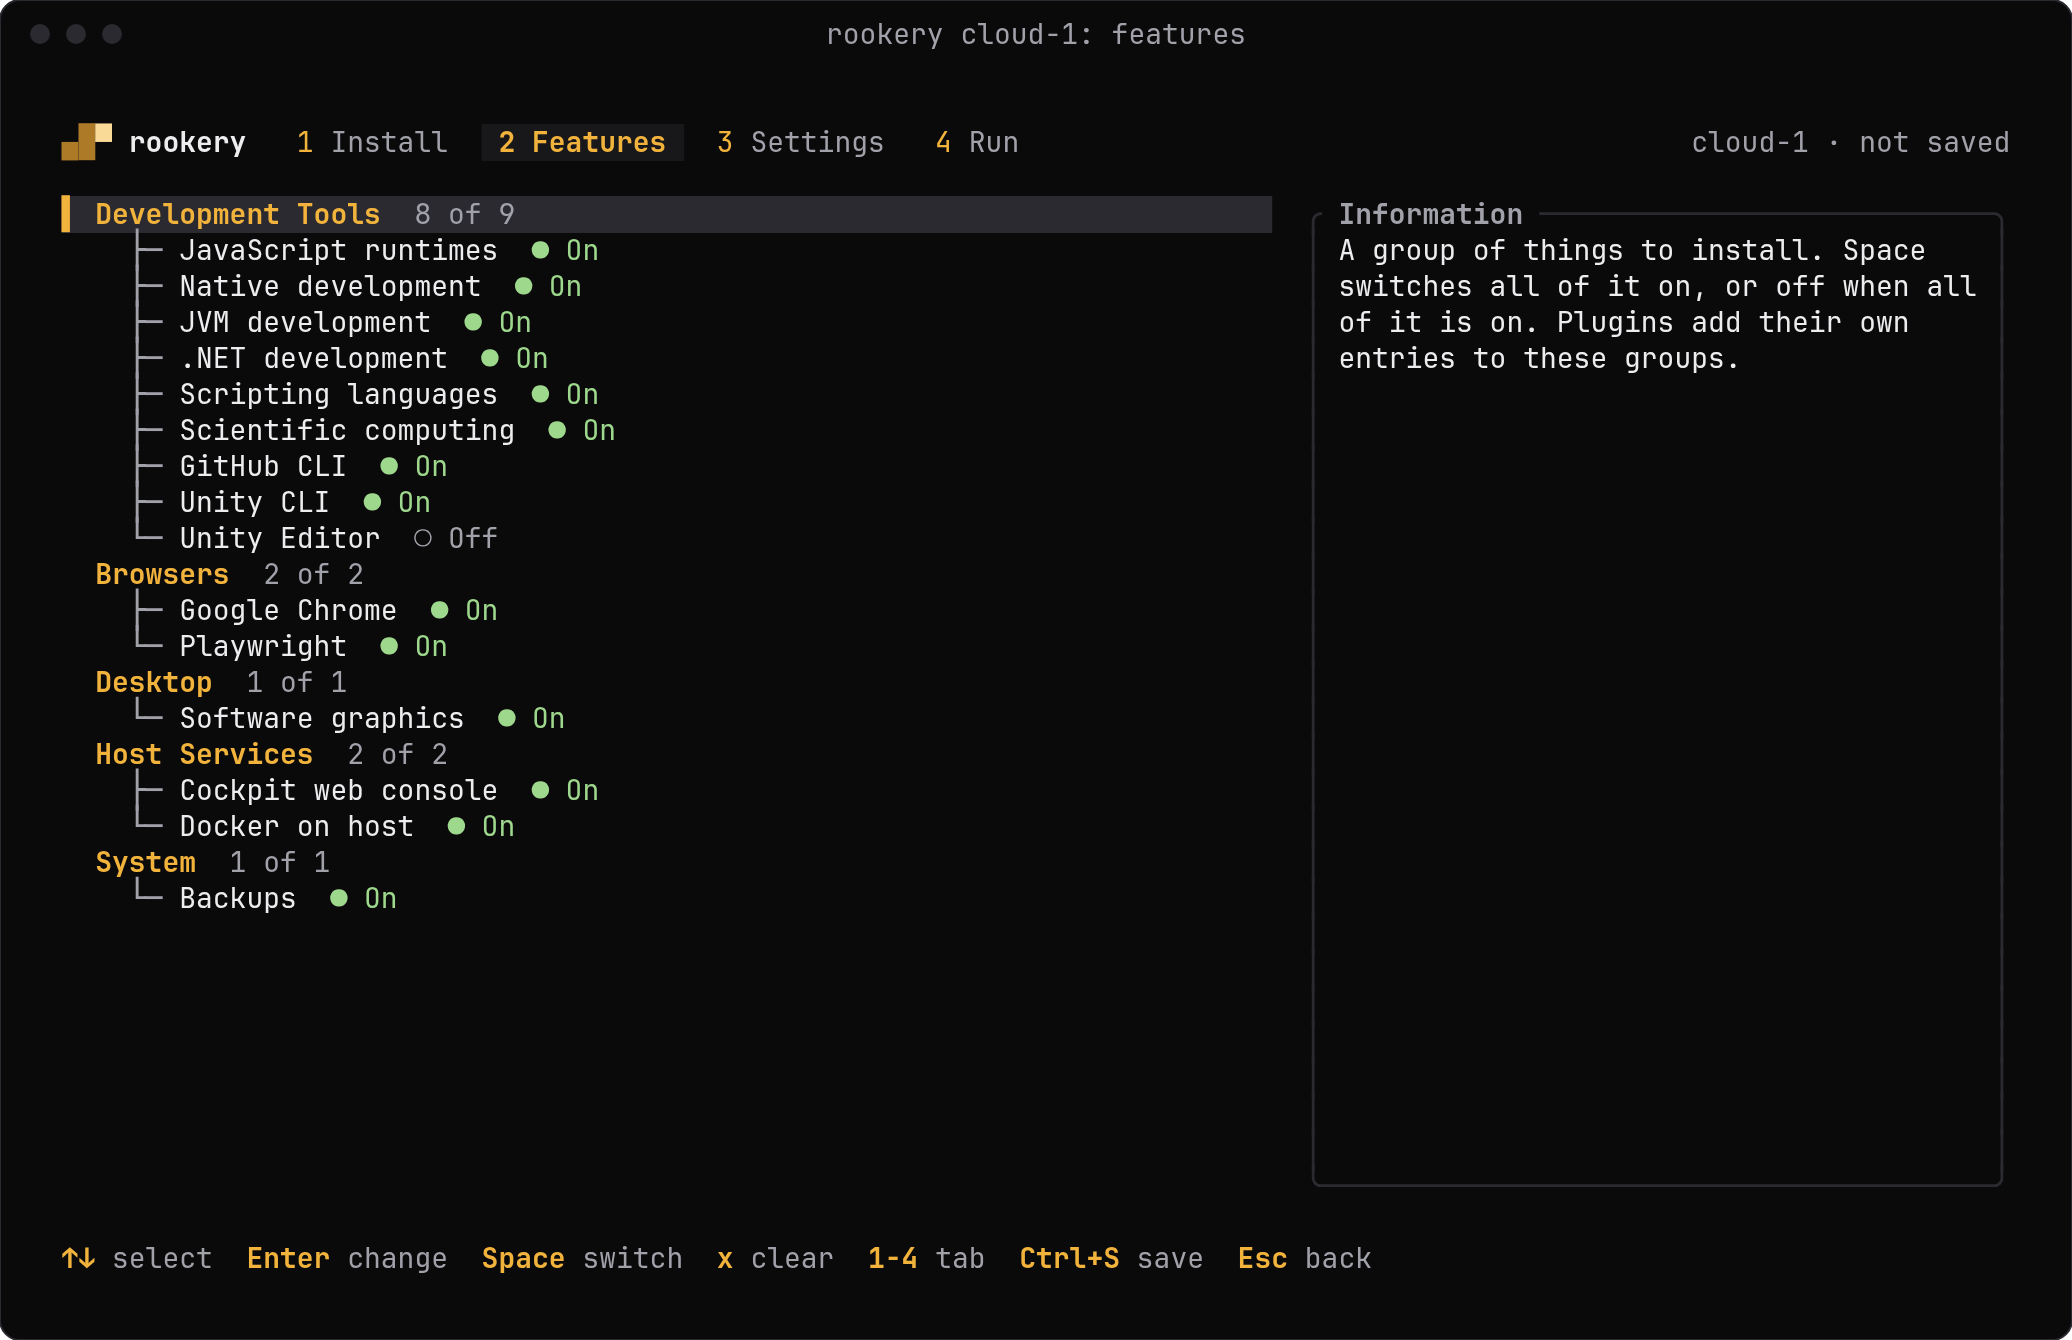
Features (key 2) lists the tool categories, browsers, Cockpit and the features of the installed plugins, which is where the coding agents are. Space on a group heading switches the whole group. Plugins says how to install one.
Check the settings
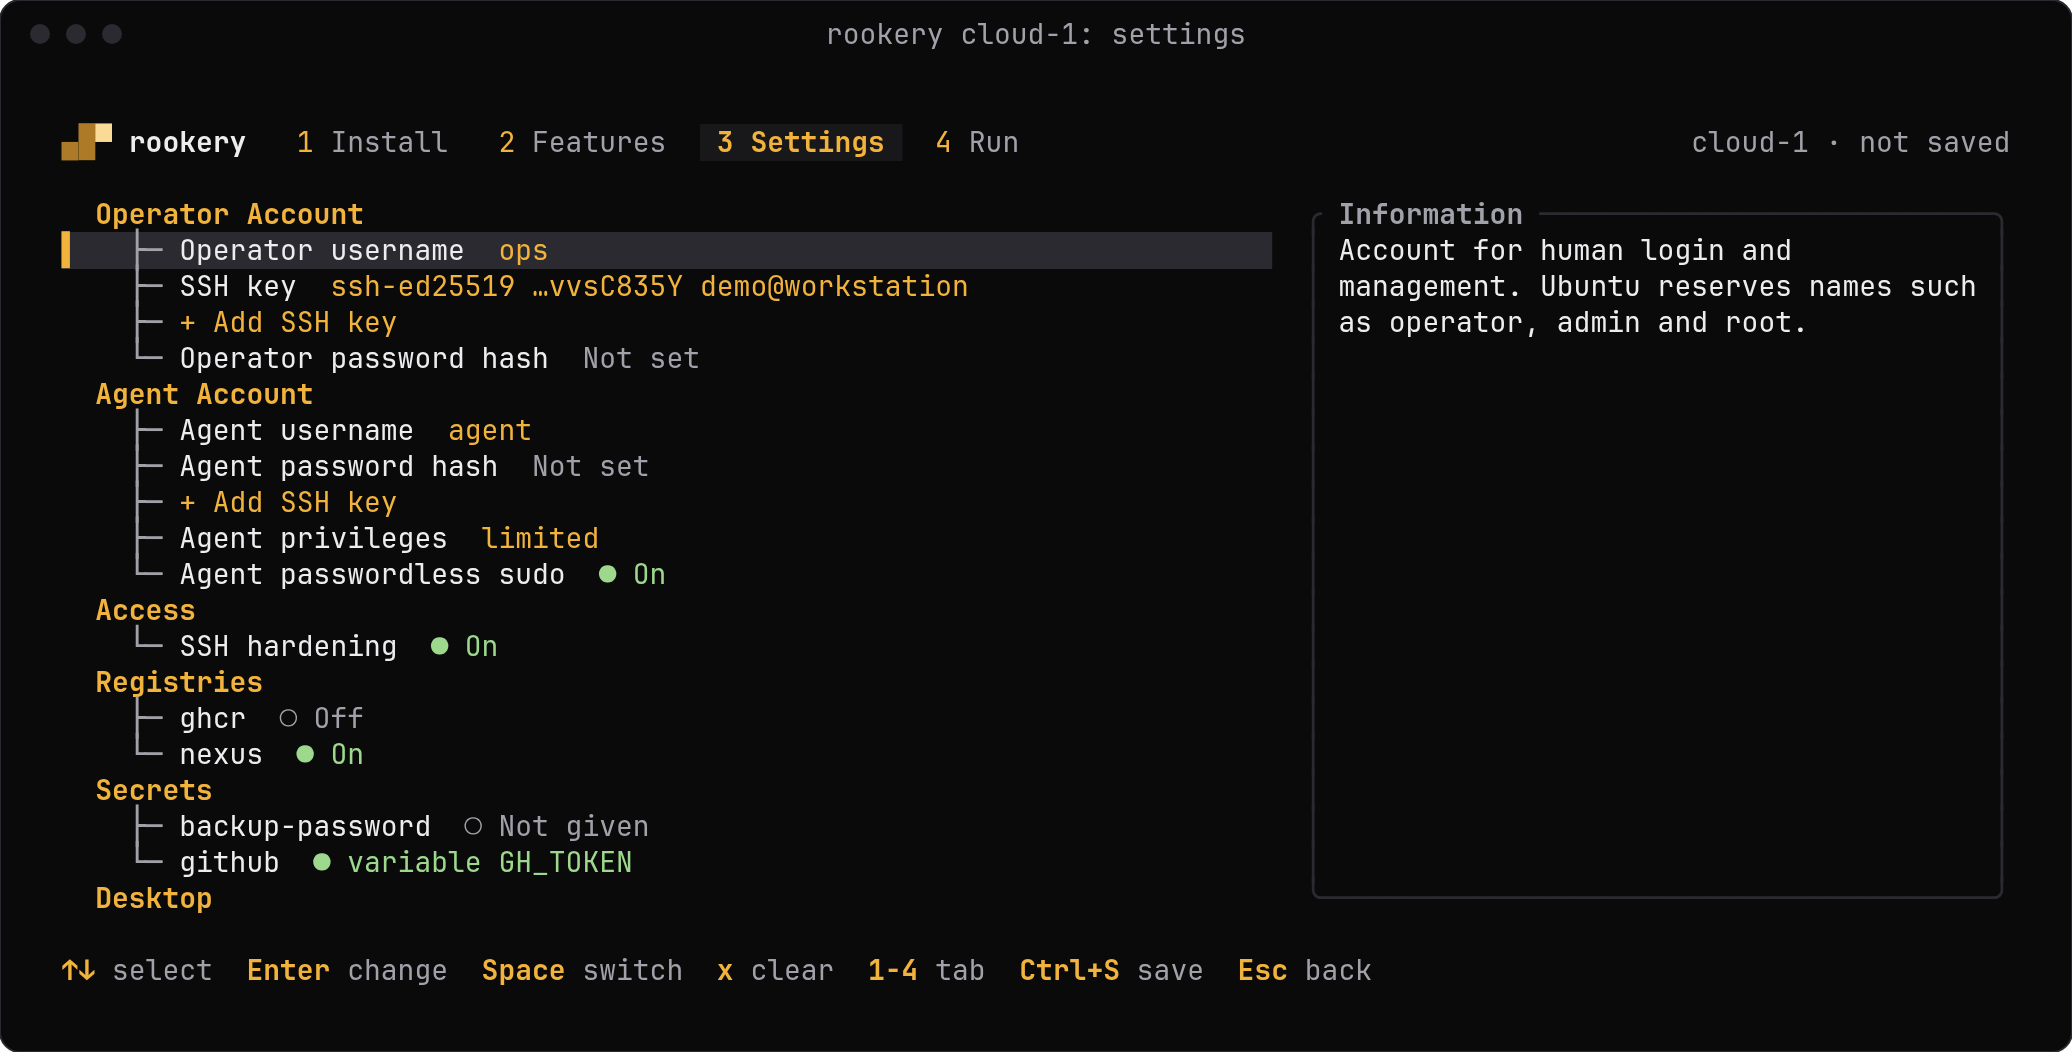
Settings (key 3) holds what has a default. That covers the operator, your account on the host, and the agent account the coding agents use. Paste an SSH public key into an account's key row. Each account can take several, and the operator also takes the key of Rookery itself. c on that field copies it.
On a password hash field, F4 generates a password and stores its hash, and F5 hashes one you type. Rookery keeps a generated password in its store, and rookery host credentials studio shows it.
Install
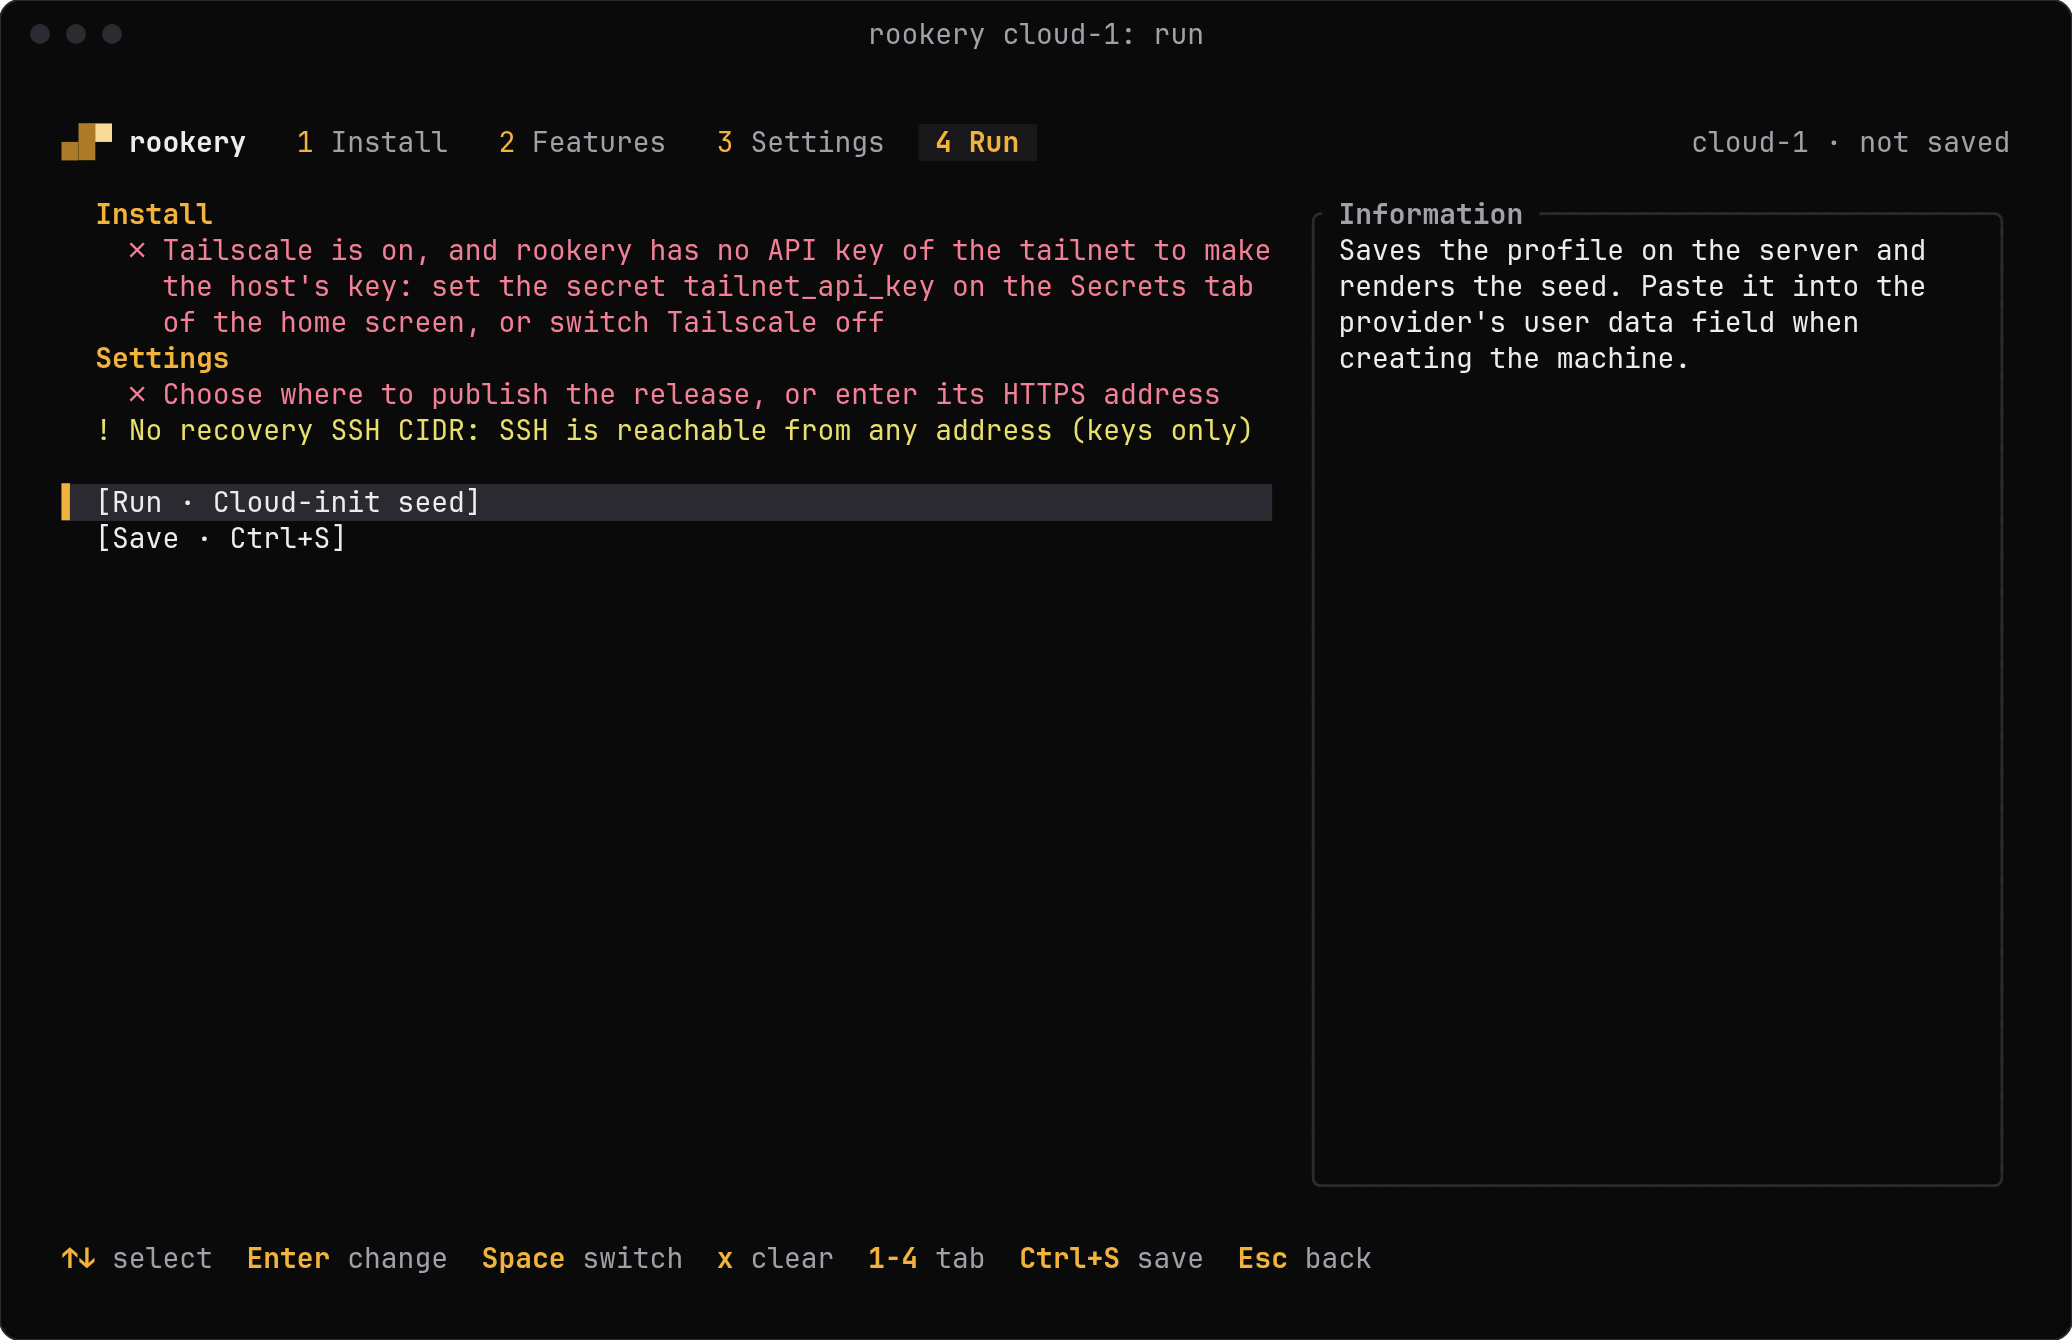
Run (key 4) lists every problem that stops the install, under the name of the tab it belongs to. Each tab also lists its own problems at the bottom. Fix them, and press Enter on Run.
The other methods are on Deploying.
Use the host
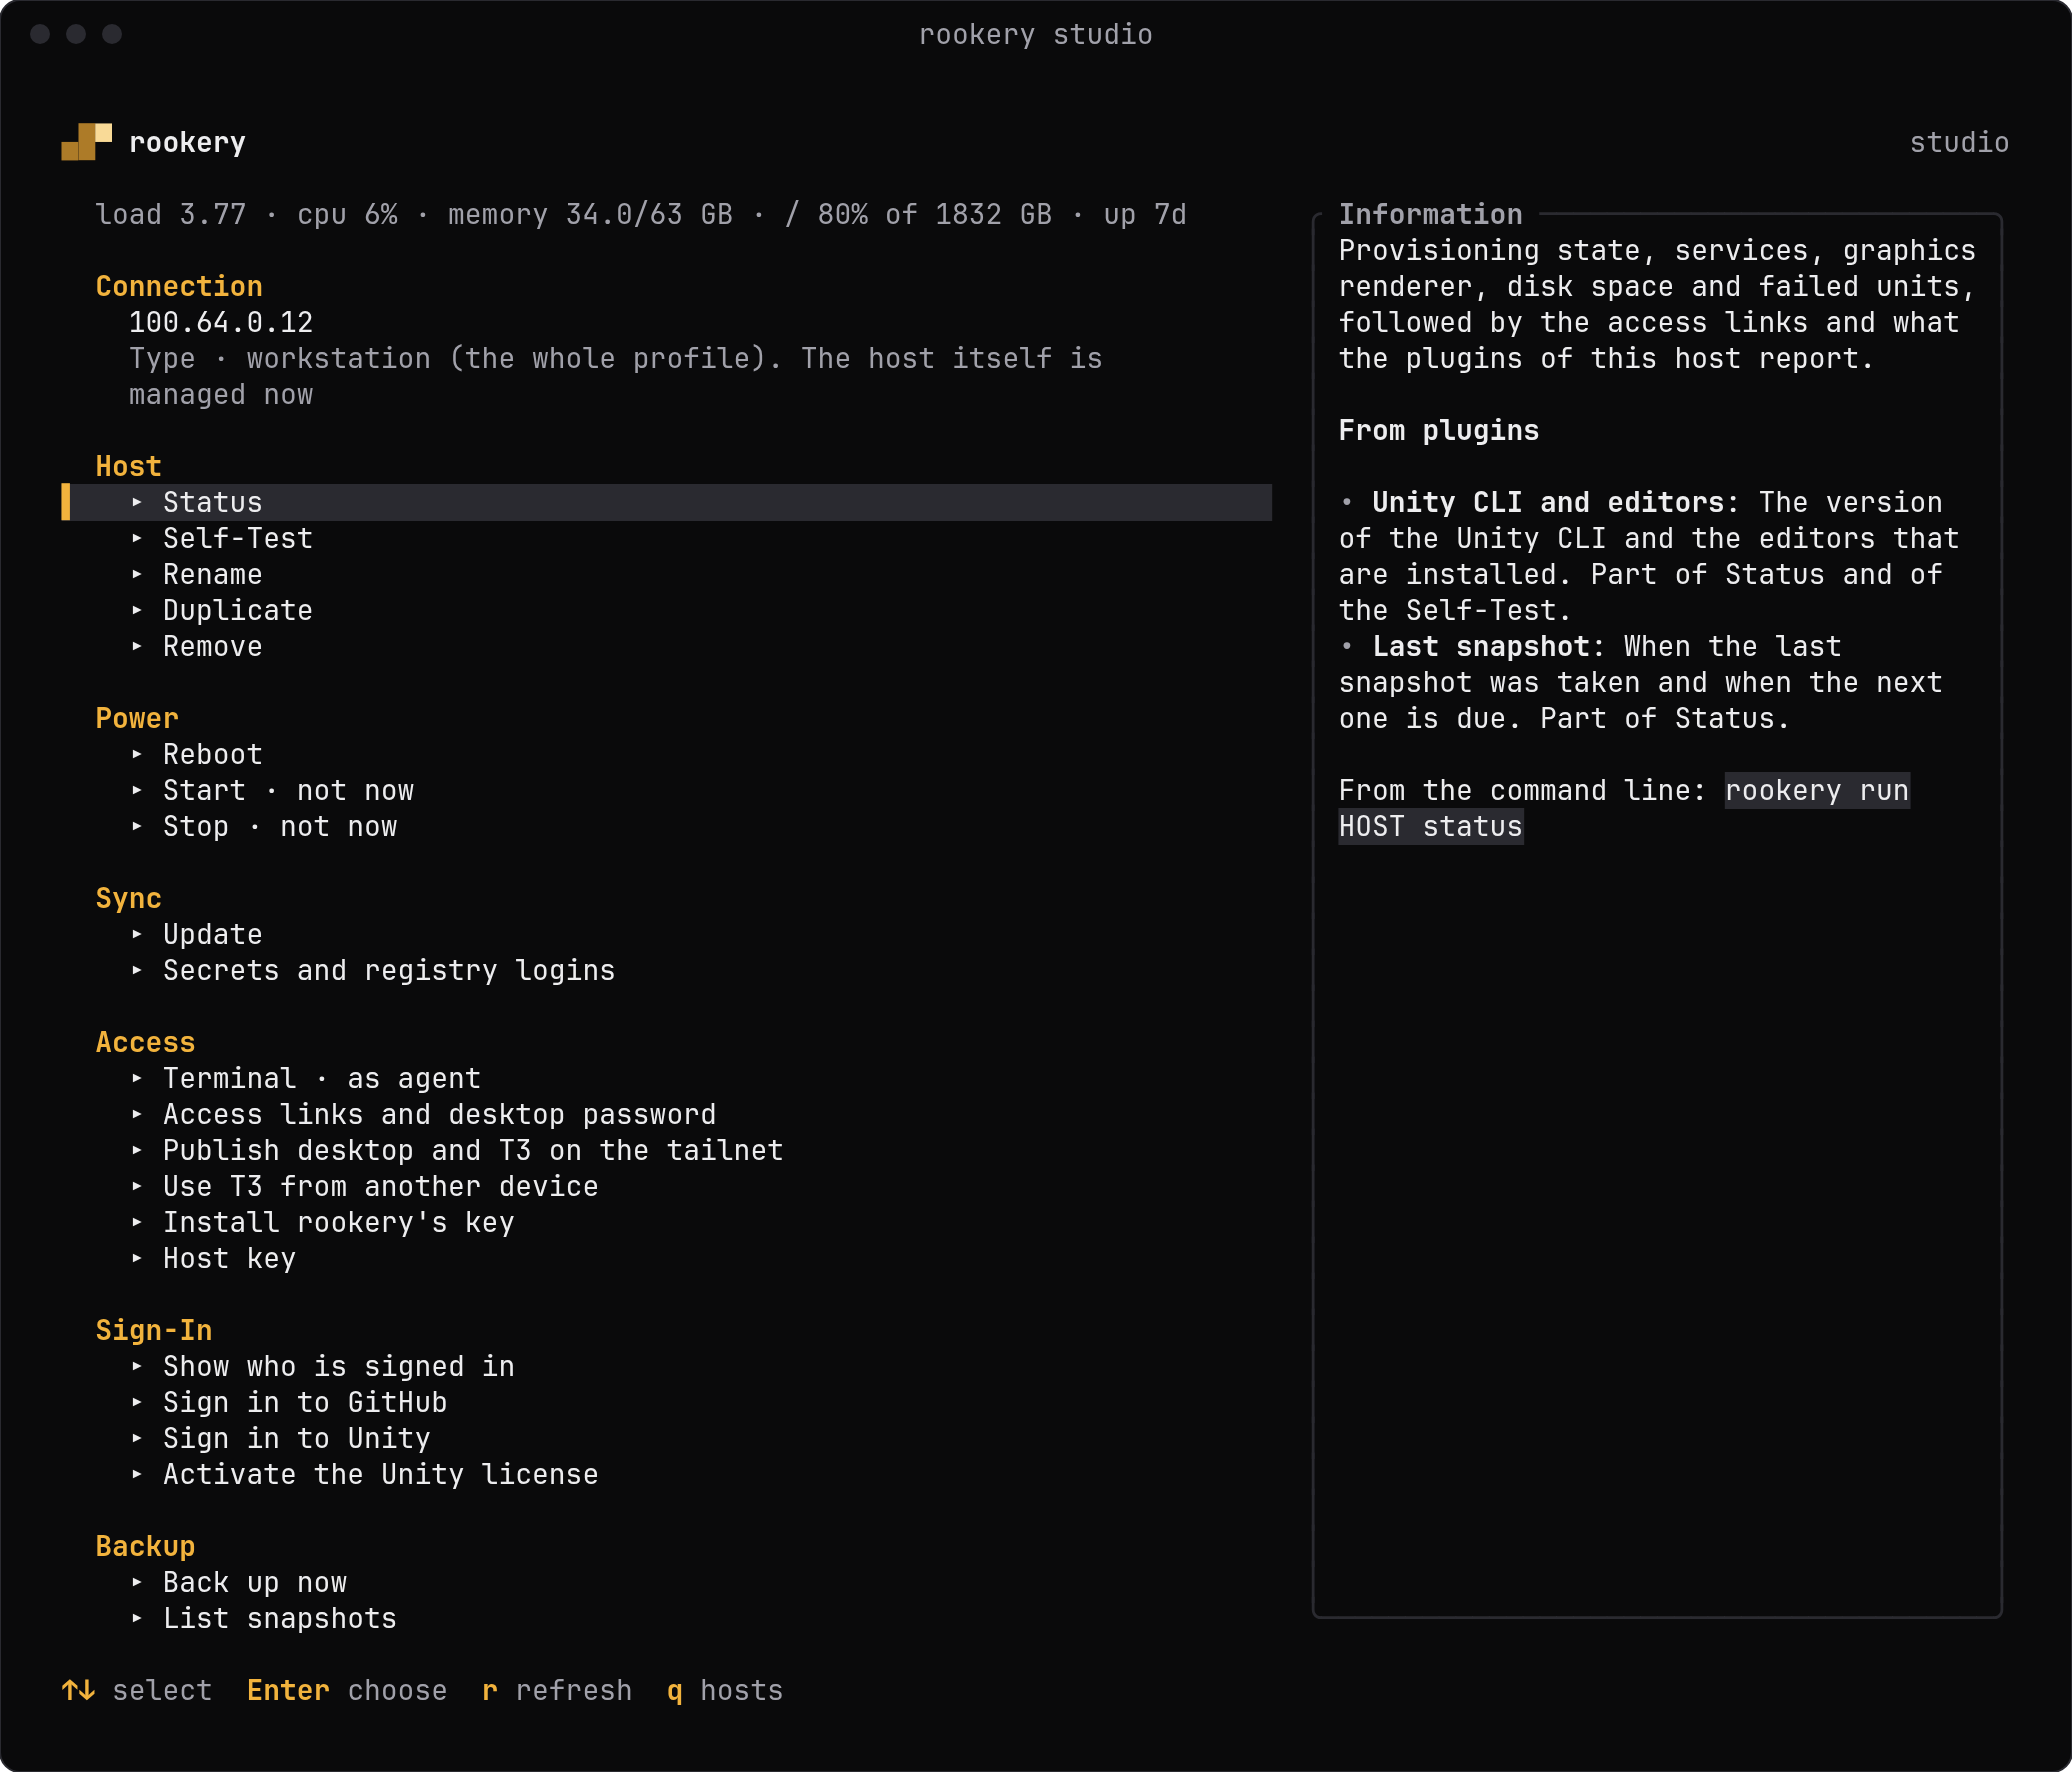
Once the host has an SSH address, rookery ui studio opens its overview. Run Status to check it, then Access links and desktop password for the address of the desktop.
Sign the agents in
Installing a coding agent or a tool does not sign it in. Under Sign-In, Sign in to GitHub and the actions that other plugins add run the tool's sign-in on the host and show its link, which you open in your own browser. See Sign-ins.
The same with the commands
rookery host create asks the questions of the four tabs in their order, below the command. Each flag answers one. With every answer given as a flag and --no-input, it asks nothing:
rookery host create studio --method ssh --set address=192.0.2.10 --set user=ops \
  --feature github/cli --generate-passwords --no-input
rookery host apply studio
rookery host credentials studio
rookery host apply follows the install as a job until it ends. rookery ls lists the hosts and whether each answers, and rookery action list studio names what it can do. rookery run studio status runs one. A step that fails says which flag or field to fix, and exits with a status of its own. The reference lists the exit statuses.
Next
Last updated on